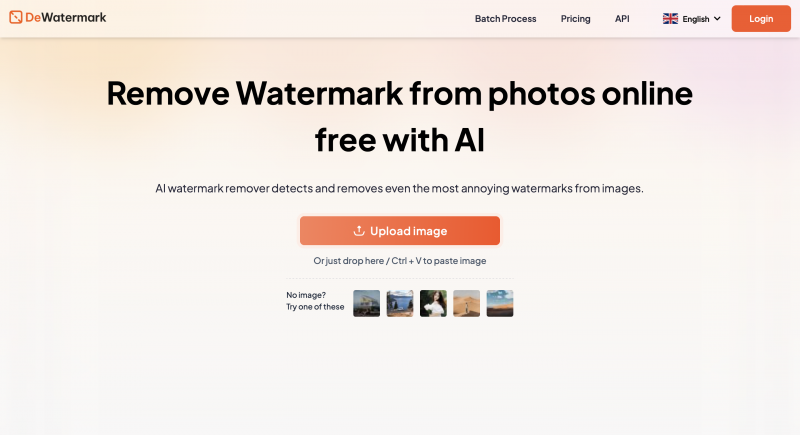
Remove Watermarks From Photos Using Dewatermark.ai
Watermarks can be a nuisance, especially when you want to use an image for personal or professional projects. Fortunately, tools like Dewatermark.ai provide a straightforward way to remove watermarks from photos. This guide will walk you through the step-by-step process of using this online tool, ensuring you can easily reclaim your images without the hassle of complex software.
Understanding watermarks
Before diving into the process of how to remove watermarks, it is essential to understand what watermarks are. Typically, watermarks are text or logos overlaid on an image to indicate copyright or ownership. While they serve a purpose for the original creator, they can detract from the aesthetic appeal of an image when used elsewhere.
Legal considerations
Before removing a watermark, it’s crucial to note that using images without permission can infringe on copyright laws. Ensure you have the right to edit and use the photo in question. For personal use, you might be fine, but for commercial use, always seek permission or use images that are royalty-free.
Step 1: Accessing Dewatermark.ai
To get started, open your web browser and navigate to [Dewatermark.ai](https://dewatermark.ai). The website is user-friendly and designed to facilitate watermark removal with ease.
Step 2: Uploading your photo
Once you are on the Dewatermark.ai homepage, look for the “Upload” button. Click on it, and a file explorer window will pop up, allowing you to select the photo from which you want to remove the watermark. You can upload various formats, including JPEG and PNG.
Tips for selecting photos
1) Choose a high-quality image: The better the quality of your original photo, the more successful the watermark removal will be.
2) Check for multiple watermarks: If your image has multiple watermarks, Dewatermark.ai can handle them, but you may need to repeat the process for each one.
Step 3: Selecting the watermark area

After uploading your image, you will be taken to a preview screen where you can see your photo. Here, you’ll want to use the selection tool provided by Dewatermark.ai to outline the watermark area.
Using the selection tool
1) Zoom in: Use the zoom feature to get a closer look at the watermark, ensuring precision in your selection.
2) Draw a box: Click and drag to create a box around the watermark. Make sure to encompass the entire area, including any overlapping sections.
3) Adjust the selection: If needed, you can adjust the edges of your selection by clicking and dragging the corners.
Step 4: Removing the watermark
Once you have successfully selected the watermark, look for the “Remove Watermark” button on the interface. Clicking this will prompt Dewatermark.ai to process your image and remove the selected area.
Waiting for processing
The processing time will vary depending on the size of your image and the complexity of the watermark. Typically, it takes just a few moments. You will see a progress bar indicating how much time is left.
Step 5: Reviewing the result
Once the processing is complete, Dewatermark.ai will display the edited image alongside the original. This side-by-side comparison allows you to evaluate how effectively the watermark has been removed.
What to look for
1) Smoothness: Check the area where the watermark was located to ensure it looks natural and blends well with the surrounding content.
2) Quality: Assess the overall quality of the image. There should be no noticeable artifacts or distortions.
If you are satisfied with the result, proceed to download your edited photo.
Step 6: Downloading your image
To download your watermark-free image, click on the “Download” button. The image will be saved to your computer in the original format you uploaded.
Post-download options
1) Check the file size: Ensure the file size is appropriate for your needs. Sometimes, processed images can be larger or smaller than expected.
2) Consider further edits: If necessary, you can make additional edits using photo editing software before using the image.
Step 7: Final touches (Optional)
If you want to enhance your image further, consider using editing software to adjust brightness, contrast, or color balance. This can help ensure your image looks its best after watermark removal.
Troubleshooting common issues
While Dewatermark.ai is designed to be user-friendly, you may encounter some challenges. Here are solutions to common issues:
- Watermark not completely removed: If the watermark isn’t entirely gone, try re-uploading the image and adjusting your selection. Ensure you encompass the entire watermark area and try processing it again.
- Image quality degradation: In some cases, the quality of the image may be compromised during processing. If this happens, consider using a higher resolution version of your original photo for better results.
- Tool not responding: If Dewatermark.ai is not responding, check your internet connection or try refreshing the page. Sometimes, server issues can cause temporary delays.
Wrapping up
Removing watermarks from photos does not have to be a daunting task. With tools like Dewatermark.ai, you can achieve professional results in just a few clicks. By following the step-by-step instructions outlined in this guide, you can reclaim your images and use them freely for your personal or professional projects.
Remember to respect copyright laws and only remove watermarks from images you have permission to use. Happy editing!
FAQs about removing watermarks
1) Is it legal to remove watermarks?
Removing watermarks can infringe on copyright laws if you do not own the image. Always ensure you have the right to modify and use the image before proceeding.
2) Can I remove multiple watermarks at once?
Dewatermark.ai allows you to remove multiple watermarks, but you may need to repeat the selection and removal process for each watermark on the image.
3) What file formats does Dewatermark.ai support?
Dewatermark.ai supports various image formats, including JPEG and PNG, making it versatile for most photo types.
4) How does Dewatermark.ai work?
Dewatermark.ai utilises advanced algorithms to intelligently analyse and remove watermarks from images, filling in the removed areas with surrounding pixels to maintain the image’s quality.
With this comprehensive guide, you are now equipped to remove watermarks efficiently and effectively. Enjoy your watermark-free images!


